A memorial video brings photos, music, and short memories together in a way that feels natural during a funeral service, celebration of life, or family gathering. It can also be shared on an online memorial so people who cannot attend can still watch and remember.
CreateMemorial now focuses on practical memorial pages, galleries, stories, tributes, and a funeral slideshow workflow. This guide avoids features you do not need and explains a clear process for creating a respectful video from real photos and memories.
Decide where the video will be used
The right format depends on the setting. A video for a funeral home should be simple, tested, and exported as MP4. A video for an online memorial can be slightly longer and may include more family photos or captions.
| Use case | Best length | Best format |
|---|---|---|
| Funeral or memorial service | 3-7 minutes | MP4 on USB plus backup link |
| Reception background playback | 8-15 minutes | Looping MP4 |
| Online memorial page | 3-10 minutes | MP4 or hosted video link |
Step 1: Gather photos and short clips
Start with the memorial gallery if one already exists. Add family photos, scanned prints, favorite places, and any short phone clips that capture voice, movement, or personality. If relatives have photos, ask them to share the files before you begin editing.
For most services, 40 to 80 photos is enough. If you include short clips, keep them brief so the video does not lose its rhythm.
Step 2: Choose a simple story structure
Chronological order is the easiest structure: early life, family, work, hobbies, later years, and a peaceful closing image. If chronology is difficult, use themes such as Family, Friends, Travel, Work, and Everyday Joy.
Step 3: Add short captions
Captions should help viewers understand the moment without turning the video into a document. Use names, places, years, and short phrases. Keep text large enough to read from the back of a room.
Step 4: Choose music with care
Music sets the emotional tone. Choose one or two songs that fit the person and the setting. If the video will be played publicly, check whether the funeral home or venue has music licensing requirements. When in doubt, use music that is permitted for the event.
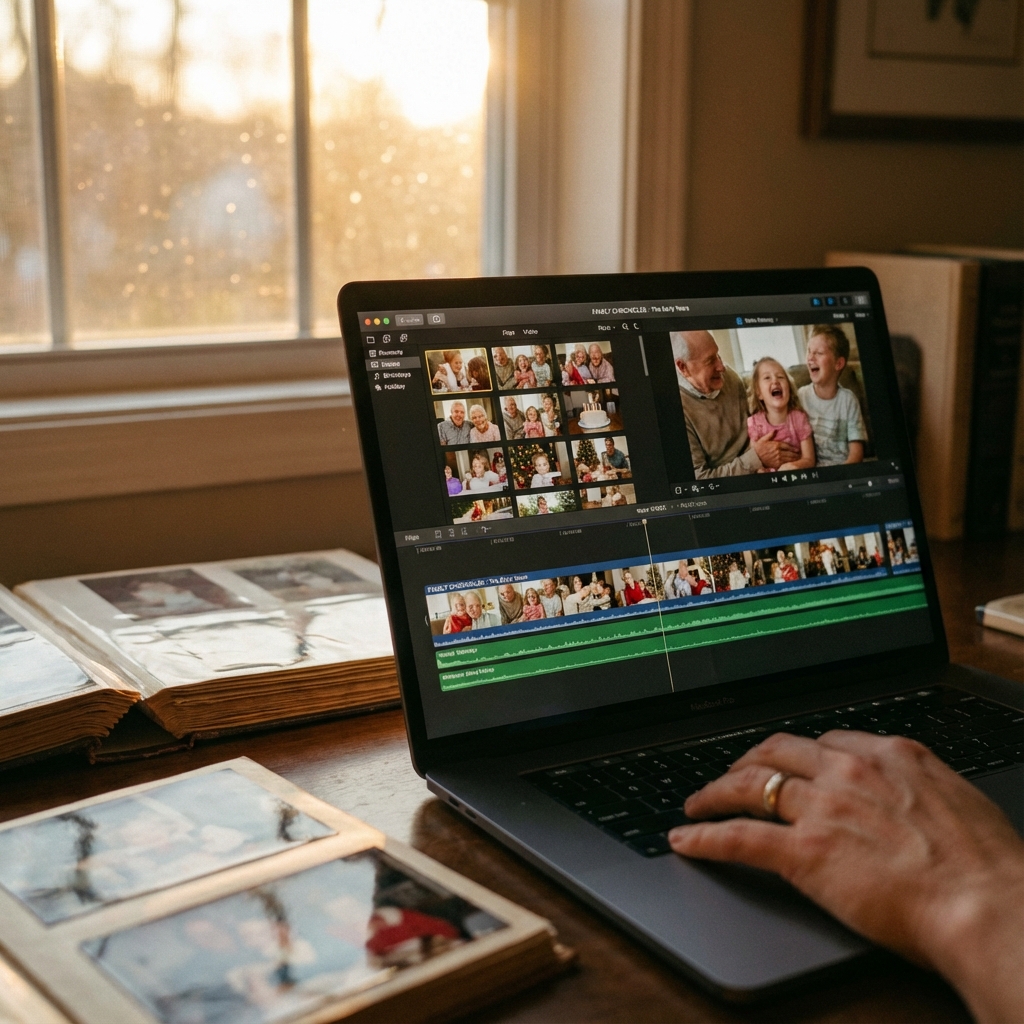
Step 5: Build and preview the video
Use a slideshow or video editor to add photos, captions, transitions, and music. In CreateMemorial, the funeral slideshow maker is designed for this kind of photo-based memorial video. Preview the full video before exporting and look for three things: pacing, cropping, and readability.
Step 6: Export and test the MP4
Export the finished video as MP4. Play it from start to finish on the device that will be used at the service when possible. Bring a USB drive, keep a cloud backup link, and send a copy to another family member.
Common mistakes to avoid
- Using too many photos and making the video longer than people can comfortably watch.
- Choosing transitions that feel distracting during a solemn service.
- Adding text that is too small for a room or projector.
- Waiting until the day of the service to test the file.
- Using music without checking whether it is allowed in the venue.
Final checklist
- Photos and short clips gathered in one folder
- Story order chosen
- Captions checked for spelling and dates
- Music selected and volume balanced
- MP4 exported and tested
- USB copy and backup link ready